What to Check Before Installing a New Washing Machine
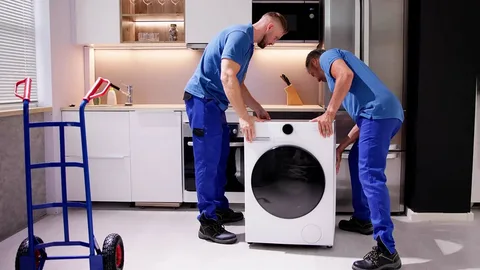
Bringing a new washing machine into your home is an excellent way to upgrade your laundry routine, boost water efficiency, and protect your clothing. However, a smooth delivery and installation process requires more than just unboxing the unit and plugging it in. Before your new laundry equipment arrives, evaluating your laundry space, checking utility hookups, and measuring access pathways are essential steps. Booking certified Appliance Installation in Palm Bay, FL ensures that your machine is connected safely, balanced properly, and free from hidden plumbing risks. Taking time to inspect your setup beforehand prevents costly home flooding, electrical faults, and unnecessary delays on delivery day.
Measuring Access Routes and Final Space Dimensions
One of the most common oversights during a laundry upgrade is failing to account for physical dimensions. Washing machines are heavy, bulky, and difficult to maneuver through tight spaces.
- Measure Entry Doorways and Hallways: Record the width and height of every doorway, stairwell, and hallway from your front entry to the laundry room. Ensure there is enough clearance for delivery dollies and technicians.
- Account for Depth and Clearance: Measure the installation cutout carefully. You must leave at least three to five inches behind the unit for water supply hoses, drain lines, and electrical cords, plus additional side clearance to prevent rattling against surrounding walls or cabinets.
Inspecting Water Supply Valves and Plumbing Lines
Your washing machine relies on continuous water pressure, making plumbing readiness a top priority. Faulty valves or worn supply lines can lead to severe indoor water damage.
Locate the hot and cold water shut-off valves behind your laundry setup. Test them to ensure they turn smoothly and shut off water completely without leaking around the valve stems. If old brass valves show signs of corrosion or rust, replace them before installation day. Additionally, always toss out old rubber hoses and invest in brand-new, burst-resistant braided stainless steel supply lines to connect your new washer securely.
Verifying Electrical Outlets and Circuit Requirements
Washing machine motors and digital control boards demand stable, properly grounded power connections to operate safely and efficiently.
Check your laundry room outlet to confirm it provides a standard 120V grounded electrical supply on a dedicated circuit. Avoid using extension cords or thin power strips, as they create electrical resistance, overheat, and pose severe fire risks. If your outlet lacks proper grounding or trips breakers frequently, having a certified team like RMJP Appliance Repair INC inspect your wiring ensures your setup complies with local electrical safety codes before your equipment arrives.
Ensuring Proper Drainage and Standpipe Height
Proper drainage infrastructure is critical to prevent wastewater backflow, foul odors, and accidental laundry room flooding during high-speed drain cycles.
Your home’s drain standpipe must be at an appropriate height—typically between 30 and 96 inches off the floor—so the washer’s internal drain pump can push water out efficiently without siphoning. Inspect the standpipe for lint blockages or mineral buildup. Securing the drain hose firmly inside the standpipe with cable ties prevents the hose from whipping out of place when the pump discharges water under high pressure.
Key Considerations for Correct Appliance Placement
Achieving a level, stable position in your laundry room is vital for long-term mechanical reliability. When focusing on Correct Appliance Placement, ensure the floor beneath the washer is structurally sound and completely level. Installing heavy laundry units on weak, sloping, or uneven flooring leads to aggressive shaking during spin cycles, which damages internal suspension springs, motor bearings, and drive belts. Proper placement eliminates excessive operational noise and prevents the machine from walking across your floor.
Removing Shipping Bolts Before Operation
New front-load and some top-load washing machines come equipped with heavy-duty metal shipping bolts installed at the factory. These bolts secure the internal wash tub during transit to prevent damage.
A major mistake homeowners make during DIY setups is forgetting to remove these shipping bolts before running the first cycle. Operating a machine with shipping bolts still attached causes violent shaking, loud banging noises, and severe structural damage to the outer tub and motor. Always remove these bolts, store them safely for future moves, and insert the plastic caps provided by the manufacturer.
Conducting Initial Test Cycles and Leak Inspections
Before considering your installation complete, systematic testing is required to verify that all connections are secure:
- High-Pressure Leak Check: Turn on water supply valves and inspect hose connections for tiny drips under pressure.
- Drain and Balance Test: Run a brief test cycle with a small load to verify that the drum spins smoothly without excessive vibration and that the drain pump clears water cleanly.
If you encounter unexpected drainage glitches or installation challenges, partnering with RMJP Appliance Repair INC guarantees expert troubleshooting to protect your investment and preserve your home’s flooring.
Conclusion
Taking time to measure pathways, inspect plumbing valves, check electrical outlets, and remove transit hardware ensures your washing machine operates smoothly from day one. Proper setup prevents catastrophic water leaks, reduces mechanical wear, and keeps your laundry routine hassle-free.
When you are ready to complete your laundry upgrade, scheduling professional Appliance Installation in Palm Bay, FL gives you complete peace of mind. Trained installation specialists handle the heavy lifting, precision leveling, and utility connections safely, allowing you to enjoy your new machinery for years to come.